
You Don’t Have to Carve Another Scary Jack-o’-Lantern This Year
Let’s be honest for a second. How many times can you carve the same triangle eyes and jagged toothy grin before it starts feeling like a chore? Don’t get me wrong, I love a classic spooky porch as much as anyone, but sometimes you want Halloween decorations that actually make people smile when they walk past your house.
A few years ago, I started swapping out traditional scary faces for characters my family actually watches and talks about all year. The difference on Halloween night was huge. Instead of little kids hanging back on the sidewalk because a creepy decoration freaked them out, trick-or-treaters were running up to the porch pointing at Pikachu and Baby Yoda. Parents were stopping to take pictures, and the whole setup just felt way more fun.
You don’t need to be a professional sculptor to pull off cute pop culture pumpkin carving ideas, either. In fact, some of the best character pumpkins rely more on a quick coat of acrylic paint, a printed paper stencil, or a cheap string of colored LED lights than fancy knife work. Below, I’ve rounded up eight of my favorite pop culture pumpkin designs that are totally doable on a Sunday afternoon, whether you’re crafting with kids or just want the coolest porch on the block.
1. Disney Princess Silhouettes with a Little Extra Sparkle
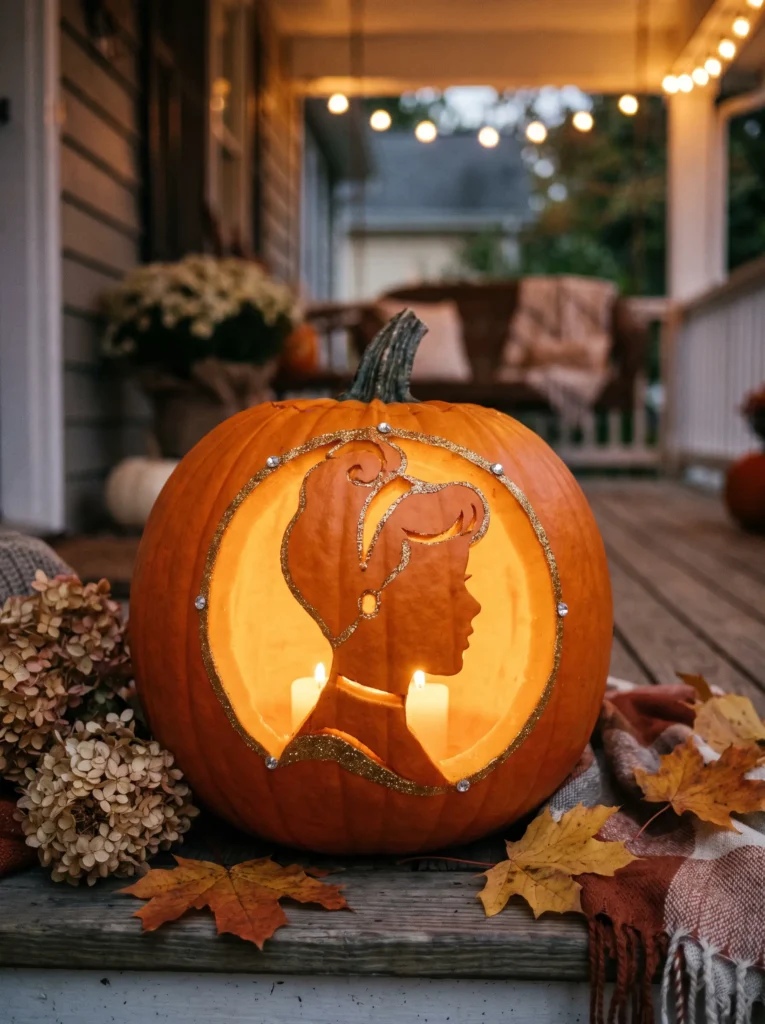
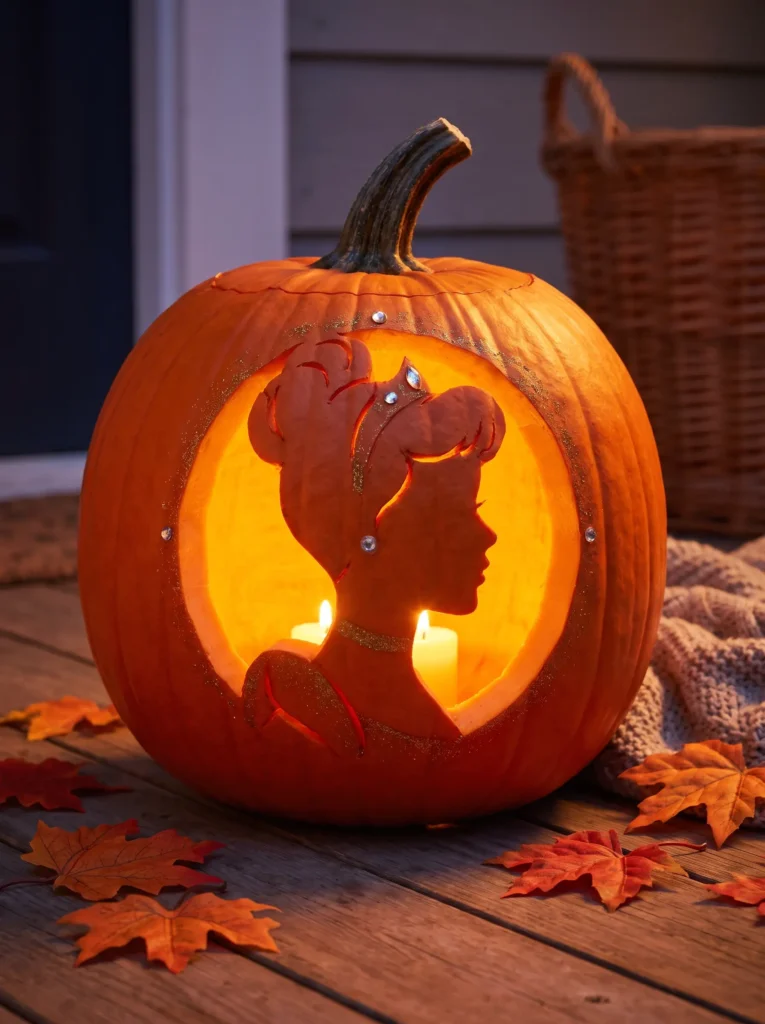
If you’ve ever tried to carve a character’s actual face into a pumpkin and watched the nose and mouth cave in ten minutes later, you already know how frustrating tiny details can be. That’s why Disney princess silhouettes work so well. You skip the tricky facial features entirely and just carve the outer profile.
Think about how recognizable Cinderella’s high bun is, or the shape of Ariel’s long flowing hair, or Belle’s ballgown. Even as a simple one-piece cutout, anyone walking by knows exactly who it is right away.
To make one, pick a tall pumpkin with a relatively flat front so your paper stencil doesn’t wrinkle too much. Tape your printed silhouette right onto the rind and poke little holes along the outline with a pushpin. Once you carve out the shape with a small detail saw, you can dress it up a bit. I like brushing a thin line of Mod Podge around the carved edge and dusting on some gold glitter, or sticking on a few flat-backed craft rhinestones like a frame. If you have kids, let each one pick their favorite princess and line them up together on the steps.
2. Hogwarts House Crests with Color-Coded Lights
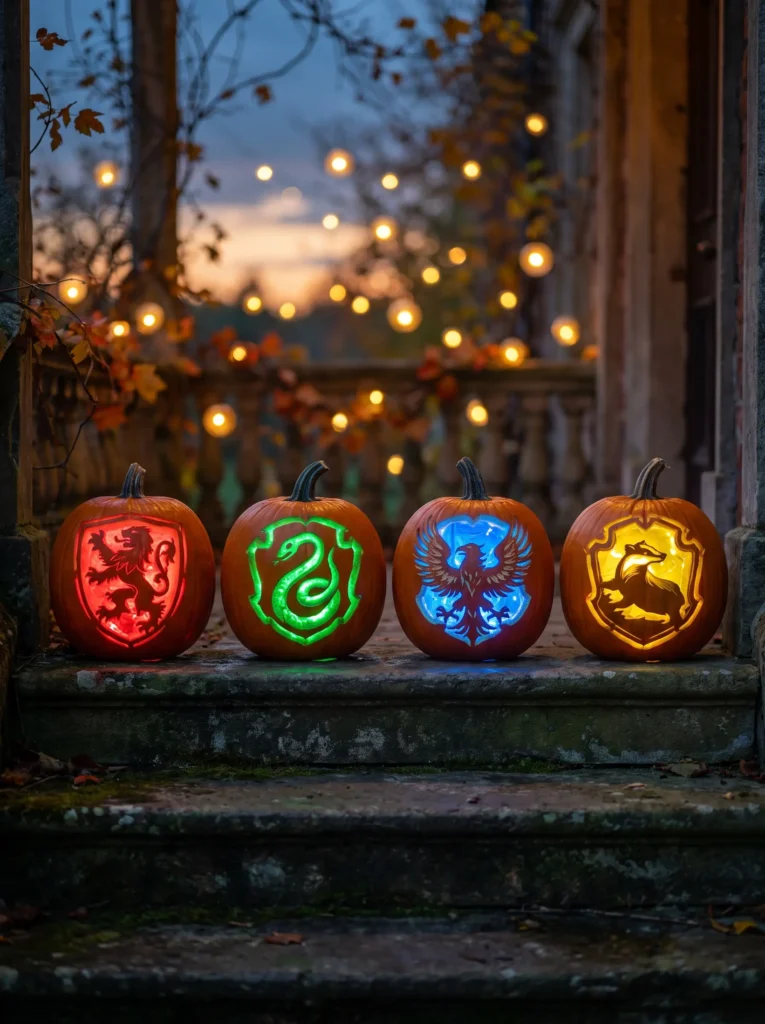
Fall already feels like Harry Potter season. As soon as the weather cools down in October, half the people I know are rewatching the movies with a mug of apple cider. Bringing Hogwarts to your front porch is a no-brainer, and house crests give you a lot of flexibility depending on how much time you want to spend carving.
If you want to keep things simple, just carve the main mascot silhouette for your house: a lion for Gryffindor, a badger for Hufflepuff, an eagle for Ravenclaw, or a snake for Slytherin. If you’re patient and enjoy detailed work, you can use a cheap linoleum carving tool from the craft store to scrape away the top layer of orange skin around the shield banner without cutting all the way through.
Here is the trick that really makes this idea pop at night: skip the regular yellow tea lights. Buy a few battery-operated LED fairy light strings in red, green, blue, and yellow. Stuff the matching color inside each pumpkin. When the sun goes down, seeing a Slytherin pumpkin glowing bright emerald green next to a ruby-red Gryffindor pumpkin looks incredible.
3. Baby Yoda (Grogu) Sitting in His Floating Pod
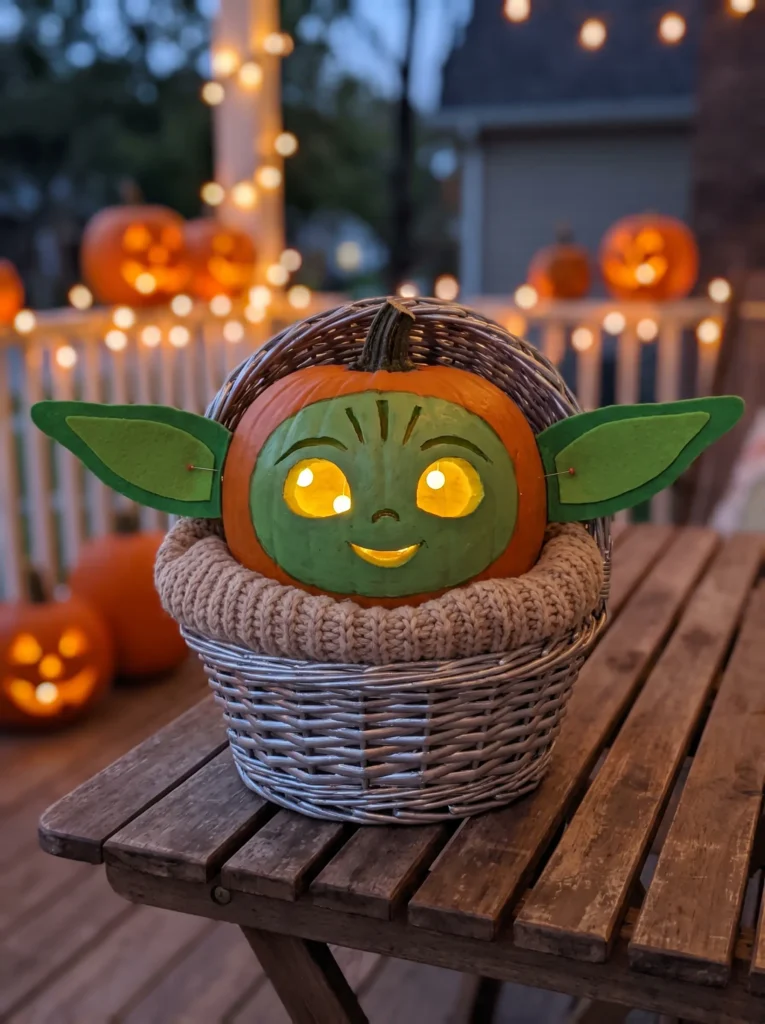
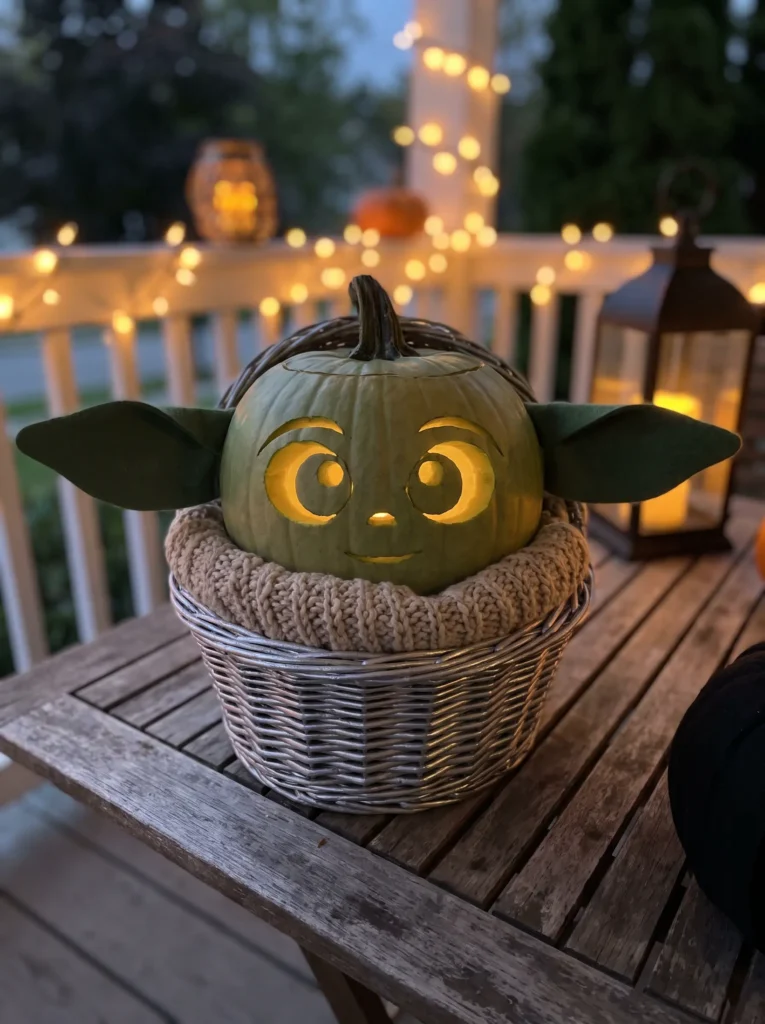
Grogu was practically made to be a pumpkin. He has a round head, huge dark eyes, a tiny nose, and those giant ears that stick straight out to the sides. A squat, medium-sized pie pumpkin matches his head shape almost out of the box.
For his face, you can get a cool two-tone look by scraping just the outer skin off for his cheeks and brow ridges, and then cutting all the way through the pumpkin wall for his big round eyes. That way, his eyes look dark during the day and glow bright at night, while the rest of his face has a softer shaded glow.
Instead of trying to carve his ears into the pumpkin itself, make them 3D. Cut two long pointed ears out of stiff olive-green felt or green craft foam, rub a little pink chalk or blush on the inside of each ear, and poke two toothpicks into the base so you can press them right into the sides of the pumpkin. Then, set the whole pumpkin inside a small round laundry basket or a silver-painted plastic bowl with a beige chunky scarf tucked around the bottom. It looks just like his floating pram from The Mandalorian.
4. Painted and Carved Marvel Superhero Logos
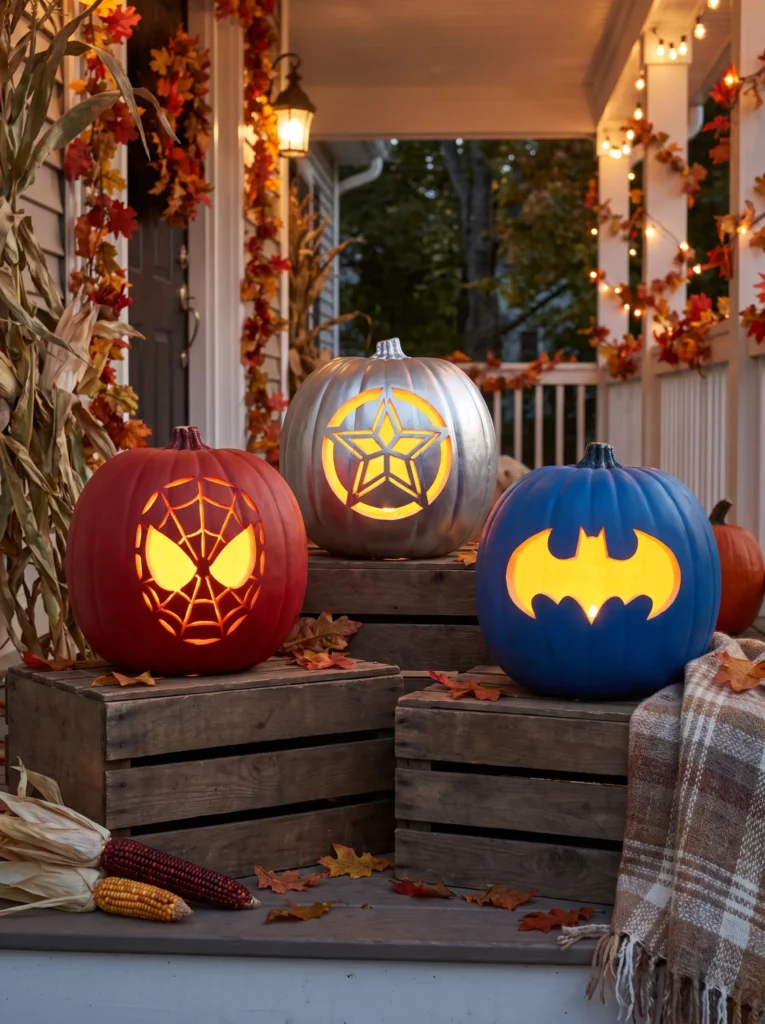
Superhero costumes are everywhere on October 31st, and comic book logos are some of the easiest shapes to carve because they use thick, bold lines. The Avengers “A”, Captain America’s shield, and Spider-Man’s mask all show up clearly from the street without needing tiny, fragile cuts.
The best way to make Marvel pumpkins stand out during the daytime is to paint the outside of the pumpkin before you ever pick up a knife:
- Wipe your pumpkin down with a damp paper towel and let it dry so the paint sticks properly.
- Brush on two coats of matte acrylic paint in your hero’s main color, like bright red for Spider-Man or royal blue for Captain America.
- Once the paint is completely dry to the touch, tape your stencil on and carve right through the painted rind.
For a Spider-Man pumpkin, you can carve out the two big white eye shapes so they glow at night, and then just draw the black webbing lines across the red paint with a thick black permanent marker. Just make sure that if you’re carving rings on a Captain America shield, you leave thick bridges of pumpkin rind connecting the circles so the center star doesn’t fall out.
5. The Stranger Things Christmas Light Alphabet Wall
Not everyone wants cute princesses on their porch, and not everyone wants gore either. If you want something that feels a little spooky and nostalgic without being scary, Joyce Byers’ living room wall from Season 1 of Stranger Things is hands-down one of the cleverest pumpkin ideas out there.
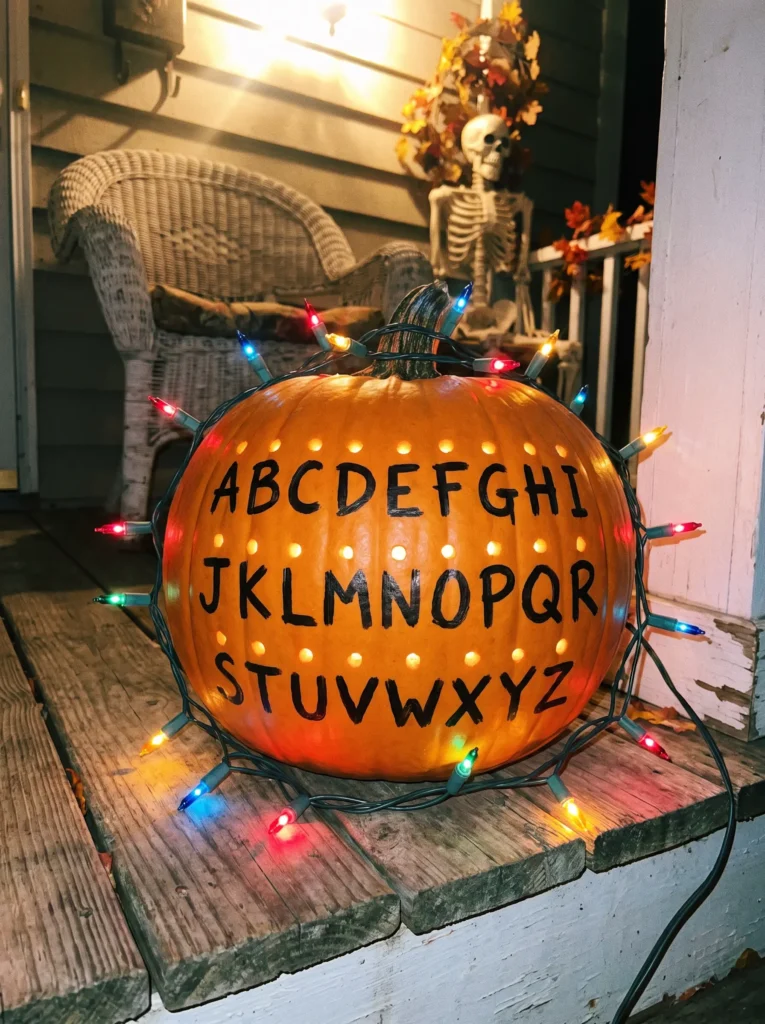
Best of all, you barely have to carve anything. Grab a wide, flat-ish pumpkin and a thick black paint marker. Write the letters A through Z in three slightly messy rows across the front, just like Joyce painted them on her floral wallpaper.
Once the letters are dry, grab a power drill with a quarter-inch drill bit (or a simple round apple corer if you don’t want to use a drill) and punch one clean round hole right above each letter. Toss a bright LED puck light inside the pumpkin, and all twenty-six holes will shine like tiny light bulbs. If you want to take it a step further, wrap an actual battery-powered string of colorful mini Christmas lights around the pumpkin and tuck a few bulbs into the holes above the letters R, U, and N.
6. Hot-Pink Barbie Pumpkins for a Glam Porch
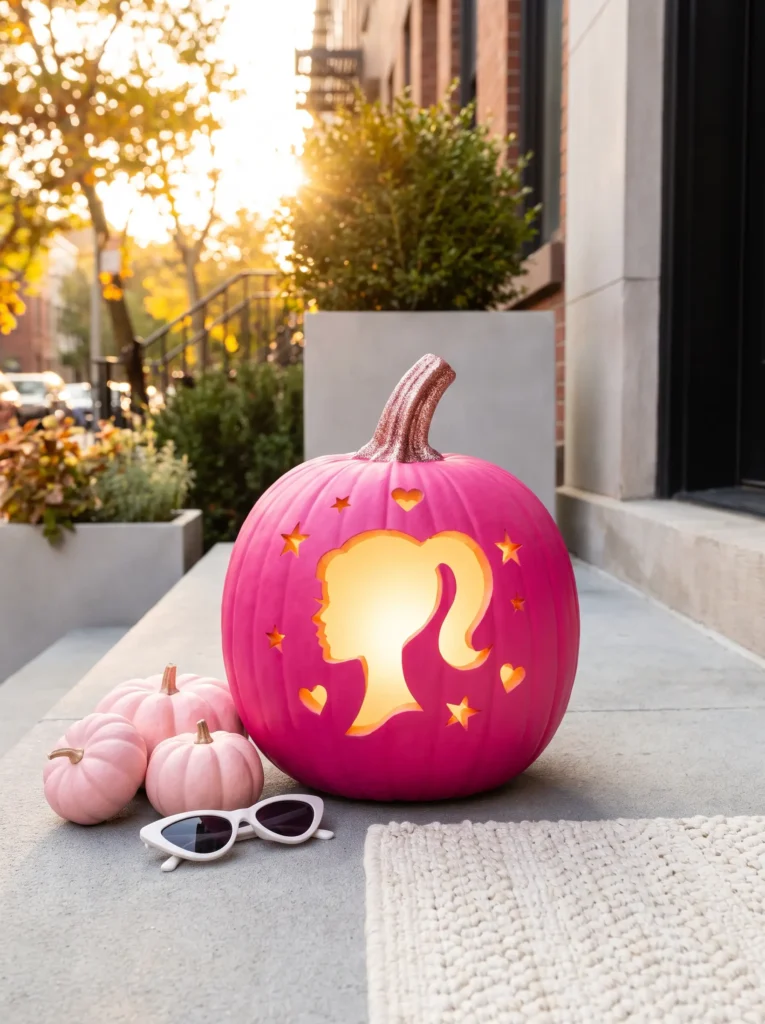
After the Barbie movie took over last year, pink Halloween decorations became a huge trend, and honestly, they look awesome mixed in with traditional fall leaves and mums. A hot-pink Barbie pumpkin breaks up all the usual orange and black and works great for a front step, a dorm room, or a Halloween party table.
Start by painting a smooth pumpkin in bright bubblegum or magenta chalk paint. Chalk paint dries super fast and gives you a smooth, velvety finish that looks expensive. While you’re at it, brush some rose-gold metallic paint or holographic glitter onto the stem.
Once the base coat is dry, you can carve the classic retro Barbie ponytail silhouette right in the center, or cut out smaller shapes like hearts, stars, and high heels all the way around. Set a pair of cheap white retro sunglasses on top of the pumpkin or surround it with a few mini gourds painted in pastel pinks and whites for a full Dreamhouse setup.
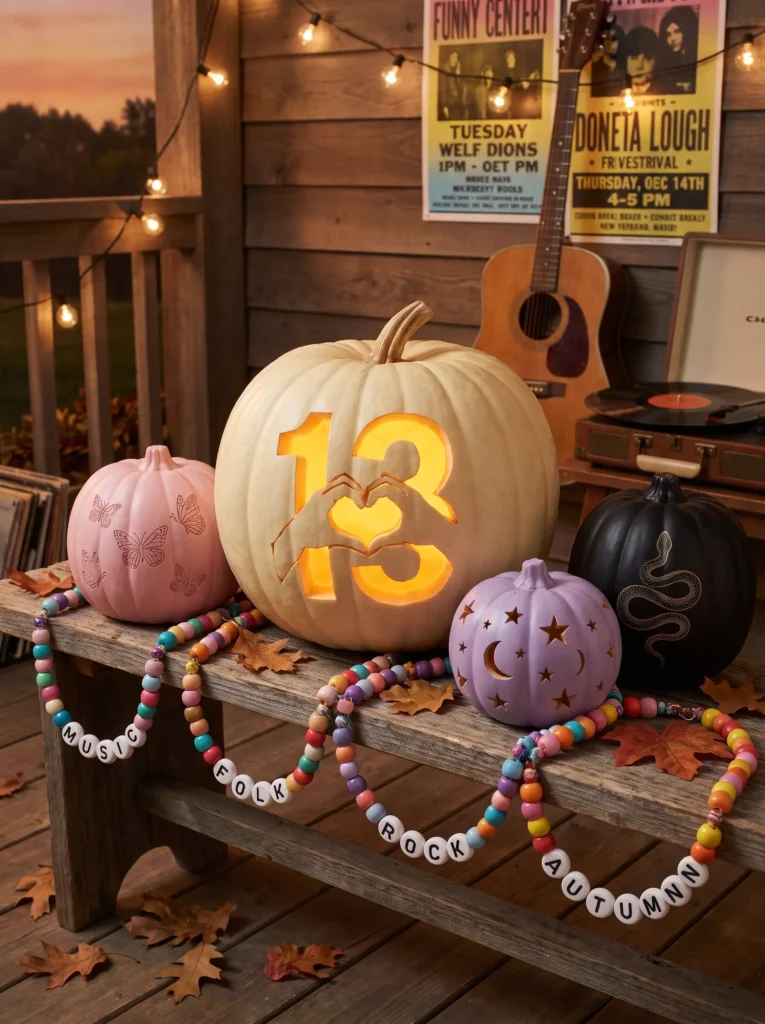
7. Taylor Swift “Eras” Pumpkins and Lucky Number 13
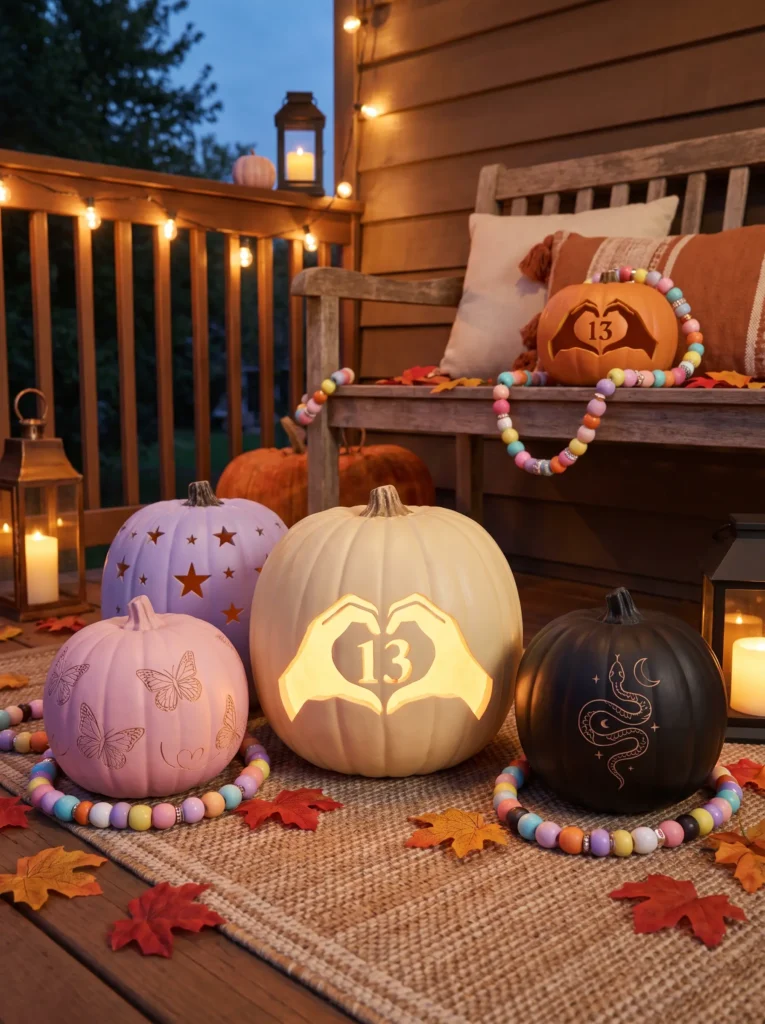
If you have a Swiftie in your house, you already know how fun it is to sneak album references into everyday projects. A Taylor Swift pumpkin can be a quick twenty-minute craft or a full-on porch display, depending on how ambitious you’re feeling.
For a single pumpkin, carving a big bold “13” (Taylor’s lucky number), a guitar outline, or her classic heart-hands shape is super sweet and easy for beginners. You could also carve a simple cat silhouette as a nod to her three cats, Meredith, Olivia, and Benjamin.
If you want to go all out, grab four or five small sugar pumpkins from the grocery store and turn them into a mini Eras lineup along your porch steps:
- Lover Era: Paint the pumpkin pastel pink and carve a simple butterfly or heart.
- Reputation Era: Paint it matte black and etch a winding snake silhouette into the front.
- Folklore Era: Spray-paint a mini gourd metallic silver to look like a mirrorball.
- Midnights Era: Paint it deep navy or lavender and draw a clock face striking midnight.
You can even string a giant “friendship bracelet” out of dollar-store foam pool noodles cut into rings and lettered with cardboard squares to drape around the pumpkins.
8. Pikachu and Retro Super Mario Power-Ups
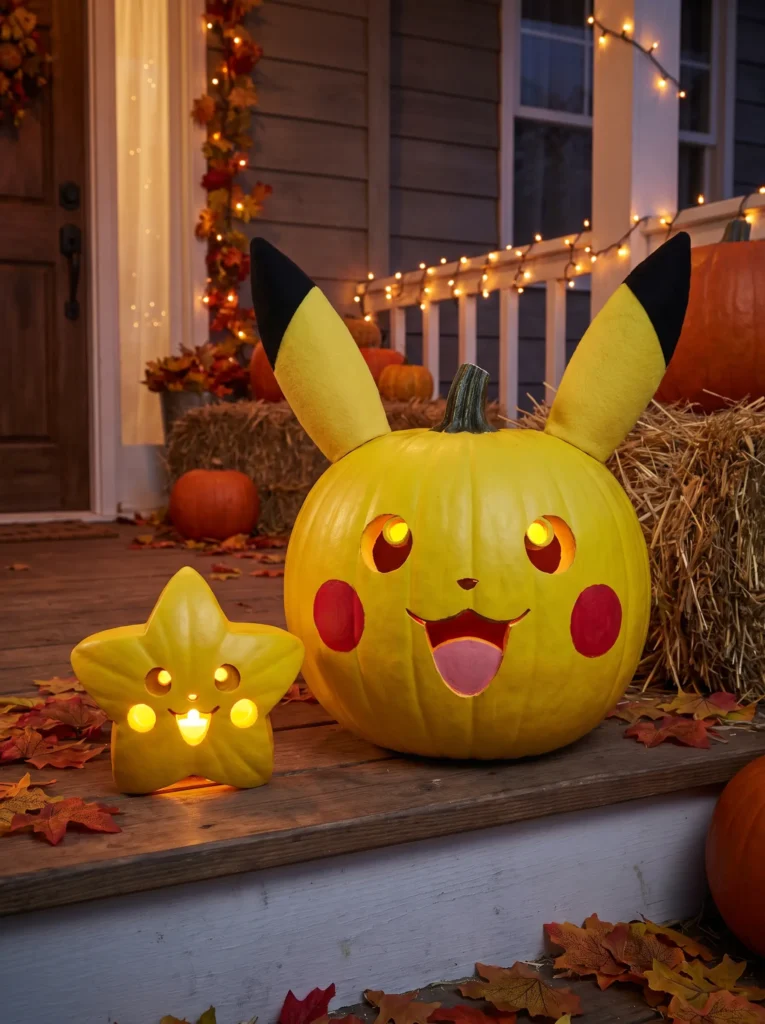
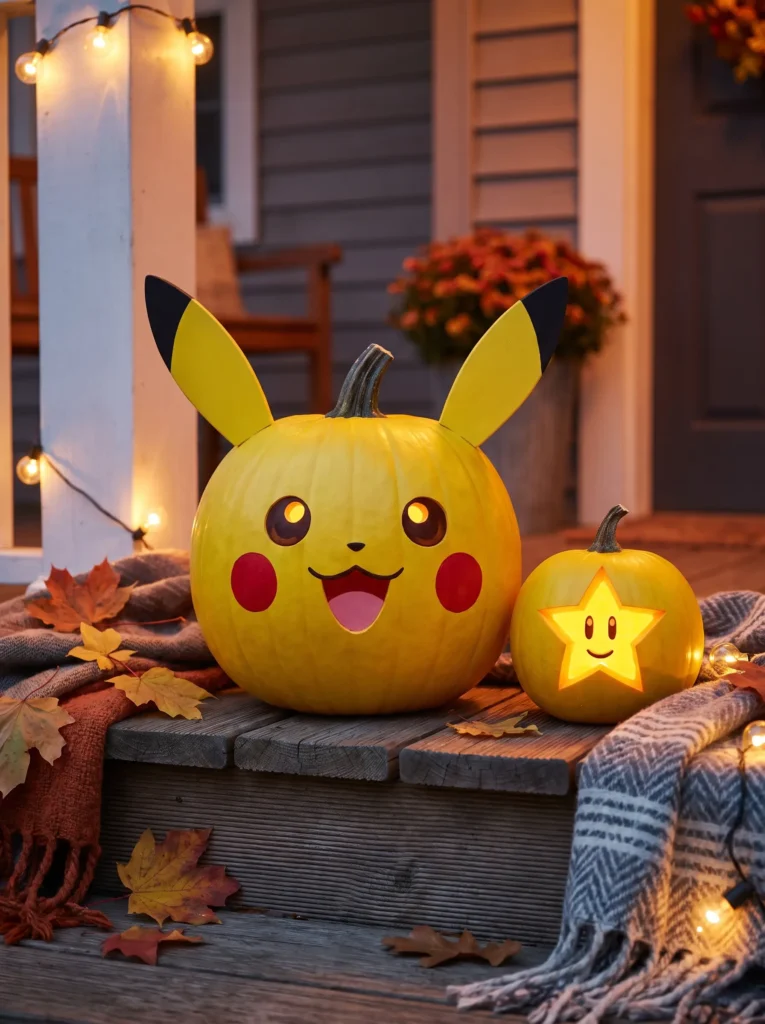
Rounding out the list is a pair of designs that always get a huge reaction from kids and nineties gamers alike: Pikachu and classic Super Mario items. Both use simple round shapes and bright primary colors that look just like toys sitting on your steps.
To make Pikachu, paint a round pumpkin bright sunny yellow. Carve out his two round eyes, tiny triangle nose, and happy open mouth, then paint two bright red circles on his cheeks. For his ears, cut two long pointed shapes out of yellow poster board or craft foam, color the tips black with a marker, and tape or pin them to the top sides of the pumpkin.
Right next to Pikachu, small pumpkins are the right size for Super Mario power-ups. Paint a small pumpkin yellow and carve a five-pointed Super Star with two vertical oval eyes in the middle. Or paint the top half of a round gourd kelly green with white spots to look like a 1-Up Mushroom. If your porch gets rained on a lot in October, give your painted pumpkins a quick coat of clear matte spray sealer so the colors don’t run.
Three Quick Tricks to Keep Carved Pumpkins Fresh Longer
Nothing is sadder than spending two hours on a cool pumpkin on October 25th only for it to shrivel into a moldy pancake by October 30th. Here are three simple things that actually keep carved pumpkins looking fresh:
- Scrape the inside wall thinner in the front: When you’re scooping out the seeds and strings, scrape the inside wall where you plan to carve until it’s about three-quarters of an inch thick. It makes your saw blade glide through the corners way easier, and it lets more light shine through if you’re doing surface shading.
- Seal the cut edges with petroleum jelly: As soon as you finish carving, rub a thin coat of Vaseline or vegetable oil over every raw cut edge. Pumpkin flesh shrivels because it loses moisture to the air, and sealing the edges slows that down by several days.
- Stick to LED lights instead of real candles: A real wax candle literally slowly bakes the inside of your pumpkin, which makes it rot twice as fast. Plus, if you’re using felt ears, paper accessories, or acrylic paint, a cool battery-operated LED light is much safer and won’t blow out every time the wind picks up.
Frequently Asked Questions
What is the easiest pop culture pumpkin design if I’m terrible at carving? Go with the Stranger Things alphabet wall or the Super Mario 1-Up Mushroom. The Stranger Things pumpkin only requires writing letters with a black marker and drilling simple round holes, and the Mario mushroom can be done 100% with acrylic paint and zero knives.
Can you really paint a pumpkin and still carve it? Yep! In fact, painting first is much easier than trying to paint around wet carved holes later. Use regular craft acrylic paint or chalk paint, let it dry for about two hours, and then tape your stencil right over the painted surface.
How do you keep a paper stencil flat on a bumpy pumpkin? Cut little one-inch slits into the blank paper margins all the way around your printed design. Those slits let the paper overlap and fold slightly so it hugs the curve of the pumpkin without bunching up in the middle.
Wrapping Up
You don’t need a degree in fine art or a fifty-dollar carving kit to make your porch stand out this Halloween. Pick one movie, game, or singer you love, grab a couple of cheap bottles of craft paint, and have fun with it. Even if a line comes out a little crooked, once you drop a bright light inside and set it out on the steps at dusk, it’s going to look awesome.